 Ever wish you could lightpaint? Never even heard of lightpainting? No matter where you fall in this list, you'll all fall on the same side after this post, if I do my job correctly... It's actually easier than it sounds, believe it or not, and if you've never heard of this practice, then today's your lucky day.
Unless it's your unlucky day, that is...
(insert bad joke sound effects)
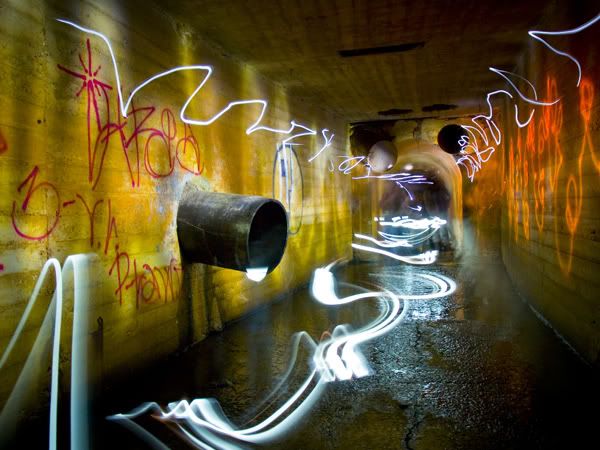
Anyways, back to my post... As long as you have a tripod, flashlight, and camera, you can do most anything that you see out there, as long as you have a little creativity (and time) on your side. The image above was my first attempt at such technique... I lucked out, however, and had 2 friends with me who also had lights of their own, since we were exploring a sewer late at night (which I don't recommend if it has rained recently or could soon, make sure to check your local weather listings). We each used two lights a piece, one headlamp style light (Splinter Cell, anyone?), and one led flashlight. Notice the orange tint to the light at the right of the image? One of our lights actually used a regular bulb, and not an led (gasp!), and it was running quite low on batteries sadly, but afterwards, it looked quite cool, with the half-dead glow of the dim light.
Here's how we achieved this image:
1) After figuring out what you'd like to make image wise, set up your tripod, and feel free to even go as far as attaching a camera to it (this might prove helpful)
2) If going for a fully "in focus" look in your image, make sure to set your aperature value to something close to f11, or smaller (larger number... confused? check out this book)
3) Shutter speed wise, we'll want a long exposure, so that we can get the surreal "light streak" look that we got above... Lets got with something at least as long as 5-10 seconds, if your camera can do such a thing. If not, check to see if it has a "bulb" mode, which will allow you to hold down the shutter button, but will trap you on the camera (make sure to have at least one friend with you if this is the case)
4) Get your lights ready, and set your camera on a two second timer, or at a timing close to that. Why, might you ask? We originally placed the camera on a tripod to keep it from shaking, so lets go the extra step, and not let the camera shake at the first of the long exposure with the movement of your finger pressing on the camera. Believe it or not, a timer does help.
5) Experimentation is the key: With your lights armed and ready for action (also known as "on" to some less hardcore flashlight junkies), press and release your camera's shutter, which will then start your timer... Get ready, it's almost party time!
6) The exposure begins... Go! Start walking around, and shining your flashlight on anything that you want to show up in your image. Make sure you evenly light the scene, if you want most of it to show up, and not be too overexposed in certain areas. Want "light streaks"? If your camera sees the front of the flashlight at any time during the exposure, it'll show up as highlights (or streaks) like it did in mine. After the camera closes its shutter, go check out the screen, and if the image is too dark, then up the exposure time, to say, 20-25 seconds. Need more? Go as long as you need! The longer the exposure, the longer time you have to "light paint" the scene.
Just as a side note, you might perhaps be seeing random colorful, yet small pixel sized dots on your image... Unless you really enjoy this as a part of your picture, I'd definitely, and strongly suggest looking in your camera's manual, and figuring out how to turn on "noise reduction", if your camera supports that... You'll be thanking me later.
Stay tuned for my next post on "Urban Exploration Safety"... It'll be action packed, I promise.
